SOTA Chaser/Activator name sheet and log.

How often have you forgotton a name during a heavy pile up of chasers?  Well for me it happens often,  most liklely old age setting in I guess! Of course there are always the regular chasers and friends one remembers instantly, however sometimes there are those callsigns you just can’t put a name to. Maybe it’s  a new or upgraded call or in the heat of the moment we forget who knows!  Some would say “so what, just ask their name during the contact” True, however I find  the pile up’s and the rhythm of the Summit activation tend to flow smoothly when you know the persons name. It becomes more personal for the contact too.  Obviously I needed a solution to aid my memory, so I just compiled a list of names and callsigns from my activation log sheets. Ok job done, so now I need to record this information for quick recall. I thought of using an electronic device such as an ipad or a tablet maybe the phone. All good but now I would need to carry yet another piece of equipment to the summit and then try to use it whilst operating the radio equipment. Now we are talking about trying to do more than one task simultaniously. Hmmm, my usual operating position balancing the radio on a log or rock, sitting on the ground with a log sheet and clip board trying to write information whilst avoiding march flies and large ants is enough to do!  Ahh its time for some old school technology, enter the good old  double sided laminated name sheet.

names

As you can see from the images, the SOTA name sheet is just a word document with some tables inserted. (Note: Not all Australian Chasers/Activators are on this list only the ones I have logged) I find the sheet handy for recalling names instantly and easier than trying to operate an additional electronic device during an activation. I also included the recommended Australian SOTA operating frequencies.  The sheet will require updating when new contacts with chasers or activators are made . I often place an astrik in my activator log sheet next to a new contact, then update the SOTA name sheet when I enter the data for the activation, otherwise I write on the SOTA name sheet with a sharpie pen then update the word document, printing and laminating when the need arises.  The SOTA name sheet has been developed for Australian call areas however it could be adapted for other countries or call areas. The file is included here in .doc and .docx format should you wish to modify it for you own use.

SOTA Name Sheet040116 .docx

SOTA Name Sheet040116

Whilst I was making a SOTA name sheet, I decided to make a log sheet too. I managed to fit upto 30 contacts on the sheet, yes I know I’m old school but I do find it easier to write things down when trying to activate a summit.

SOTA LOG.doc

I am interested in any suggested modifications or  improvements you may have, please feel free to download the documents and make changes as required.

Cheers: Rob

VK3 High Country Trek PT.2


Sunday morning at Diner Plain and the rain was still bucketing down, nothing to do but cook breakfast (fruit toast) and try to salvage the day. Since it was no longer possible to gain access to the nearby summits, I decided to take a drive towards Omeo about 40Km from Diner Plain. I reluctantly packed the SOTA equipment and set off  at 11:00am. About 12 Km from Omeo the weather started to clear, there was light rain however I could see the clouds dissipating, my luck was about to change. A quick check of the GPS showed I was close to VK3/VG045 Mt. Livingstone. I set the GPS to track towards the summit and continued.

Mt. Livingstone VK3/VG-045

Mt. Livingstone road runs off the Great Alpine road B500. It is approximately 8km from OMEO.

OLYMPUS DIGITAL CAMERA

I turned onto the gravel road and drove until  reaching a locked access gate, 4WD was not required . I parked at a small clearing to the right of the gate.

OLYMPUS DIGITAL CAMERA

There are no signs on the gate, however this is an Air Services Australia site containing an operational VHF Omni Directional Radio Range. (VOR)  and LF Non-Directional Beacon (NDB).         (VOR). This is a type of short-range radio navigation system for aircraft, enabling aircraft with a receiving unit to determine their position and stay on course by receiving radio signals transmitted by a network of fixed ground radio beacons. It uses frequencies in the very high frequency (VHF) band from 108 to 117.95 MHz. (NDB)  http://www.casa.gov.au/SCRIPTS/NC.DLL?WCMS:OLDASSET::svPath=/pilots/download/,svFileName=ndb.pdf  For more information on chasing NDB’s, Andrew VK1NAM has posted a great page with lots of information it can be found here: http://ndbchasing.wordpress.com/

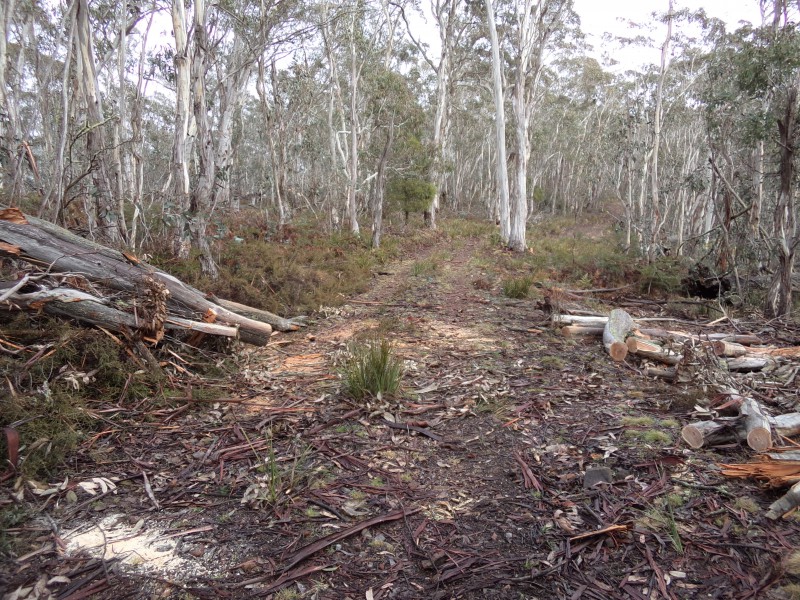
The road continues from the gate for 500 metres as gravel, then the remaining kilometre is bitumen. Nearing halfway towards the summit there is the first of the navigational beacons, a low frequency NDB. OLYMPUS DIGITAL CAMERA At the summit the road divides around the VOR site. As it happens this is a great location to setup the SOTA station, it’s within the activation zone and far enough from the VOR equipment to prevent interference.

OLYMPUS DIGITAL CAMERA

Perfect! A handy post to strap the squiddy with a seat and operating bench.

OLYMPUS DIGITAL CAMERA

OLYMPUS DIGITAL CAMERA

VHF Transmitting antenna

This site also supports the local UHF CB repeater and mobile phone transmitters. There are plenty of RF noise generators nearby. Fortunately the location for my SOTA shack had very little noise.

OLYMPUS DIGITAL CAMERA OLYMPUS DIGITAL CAMERA

After setting up, I heard Peter VK3PF working a pile up, I immediately thought there was an opportunity for a S2S contact, however as it happened Peter was activating a National park not a summit.  After  contacting  Peter, I moved to another frequency and it wasn’t long before I made a S2S contact with Allen VK3HRA/P on VK3/VG-029 Mt. Seldom Seen, followed a little later by Adam VK2YK/P on VK2/HU-024.  I managed another 9 contacts before the activity died out. Having now activated four out of a possible ten planned summits for the weekend, I was reasonably happy especially since the weather conditions had been so poor. After packing up I walked back to the vehicle (1.5Km) and drove on to OMEO for some lunch. There is a great Bakery at Omeo, what can I say? Thank goodness for SOTA and all the walking! OMEO would make an ideal base camp for a weekend of SOTA activity. There are many summits within easy reach of the town. One such summit is Sam Hill.

Sam Hill VK3/VG-049

Leaving Omeo the Great Alpine Road (B500) turns to the right, at this point I continued straight ahead along Day Avenue until meeting the Omeo Highway (C543.) Approximately 2km along the Omeo Highway, Connelys Road appears on the left. Unfortunately not realising Connelys Road would take me to the summit, I continued a further 9km until reaching the Bingo-Tice Road.

OLYMPUS DIGITAL CAMERA

Bingo -Tice Road. (Ignore vehicle orientation)

OLYMPUS DIGITAL CAMERA

I took the Bingo-Tice gravel road and followed it for 3.3km where I came to the first of five property gates. This is a gazetted road, asking permission to drive through the properties is not required. Just remember to leave the gates as you found them.

OLYMPUS DIGITAL CAMERA

I continued passing through gates at the 3.9, 4.8, 6.4, and  7.6km marks. Finally at 1.2km past the last gate I found the access road to the summit on my left.

Summit Access road on left

Summit Access road on left

OLYMPUS DIGITAL CAMERA

View looking towards summit access road.

 A fire wood collection sign marks the start of the track to the summit.

OLYMPUS DIGITAL CAMERA

Driving along the track for 600m, I came to a Y in the road and a large tree. This is the intersection with Connely’s Road. A left turn and a further 900m travel took me to the summit.

OLYMPUS DIGITAL CAMERA

OLYMPUS DIGITAL CAMERA

The site is equipped with two fire watch towers and plenty of communications antennas.

OLYMPUS DIGITAL CAMERA OLYMPUS DIGITAL CAMERA

OLYMPUS DIGITAL CAMERA

After setting up the shack at the shack, I attached the squid pole to a nearby post and fired up the radio. First contact was Robbie VK3EK followed by Andrew VK1NAM and a large pile up of chasers. I  managed a S2S contact with Glen VK3YY on VK3/VE-067 Mt. Terrible. and a total of 29 contacts. I had now activated five summits for the weekend and decided to continue to The Knocker VK3/VG-016

OLYMPUS DIGITAL CAMERA OLYMPUS DIGITAL CAMERA

The shack at the shack!

OLYMPUS DIGITAL CAMERA OLYMPUS DIGITAL CAMERA

Leaving the summit I made my way back to the Omeo Highway.

OLYMPUS DIGITAL CAMERA

Intersection at Omeo Highway, turned left towards Anglers Rest.

 The Knocker VK3/VG-016

It takes about an hour and a half to drive from Sam Hill along the Omeo Highway to the summit of the Knocker. The distance is only 54Km however the road consists of curves and hairpin bends most of the way. Once arriving at the hamlet of Glen Wills it is just 3km to the Summit access track.

OLYMPUS DIGITAL CAMERA

OLYMPUS DIGITAL CAMERA

OLYMPUS DIGITAL CAMERA

The track to the summit is an operational logging road, it is narrow with only a few places to pull over and allow trucks to pass. It’s advisable to use a UHF CB on Channel 40 to monitor the movement of logging trucks and call out your position. A 4wd vehicle is not required unless the track is wet.

OLYMPUS DIGITAL CAMERA

Fortunately the turn off to the summit is only 4km from the start of the track.

OLYMPUS DIGITAL CAMERA

When I arrived, the track had just been graded, it was like driving on a highway! From the link sign it is only 700m to the summit. I drove to the summit unloaded the equipment and then drove back 500m for a walk to the summit.

OLYMPUS DIGITAL CAMERA

I set up the shack attaching the antenna to the trig. The weather changed during the activation and became very foggy, however I managed 38 contacts and one Shack Sloth for Mike VK3XL congratulations Mike. Happy I  had six summits activated for the weekend I headed back to Dinner Plain for the night.

 The Mountain was named The Knocker during the time before the road was built, Apparently horses would pull carts over the mountain and “Knock up” their knees!

VK3/VE-023 and Mt. Murray VK3/VE-025 

Monday morning, the last day of my long weekend.  I decided to activate two summits on my way home. Heading back towards Mt. Hotham and along the Great Alpine Road, once again I turned  onto the Twins Track.

20141115_185744

This time I was intending to make it all the way to Mt. Murray, with a stop along the way to activate VK3/VE-023.  The track appeared to be in good condition and fairly dry considering the heavy rain of the previous two days. I wanted to investigate the camping area between the saddle of The Twins and VE-023. Once I passed by The Twins it was only a short drive to the camping area, really just a patch of grass between two summits!

VK3/VE-023

OLYMPUS DIGITAL CAMERA

Actually this is a fairly good place to camp, close enough to climb two summits and access Mt. Murray  comfortably in one day. Talk about a climb, VE-023 doesn’t  look like much of a climb until you start! I could see a walking trail marker in front of the summit and decided to follow the track to the top. I think that was a mistake, it was quite steep and slippery with small rocks everywhere.

OLYMPUS DIGITAL CAMERA

  To make matters worse, once I set up the shack I found the band conditions were very poor. I could only find 10 chasers that could hear me, some of the reports were down to 5 by 1. I did manage one S2S contact with Paul Vk5PAS/3 on VK3/VS-045 Mt. Dundas. To add insult to injury the return trip was difficult with many slips and trips whilst trying to stay upright. There may be a better way to the summit from further around the road. As I drove past on my way to Mt. Murray, I noticed a ridge heading toward the summit, it might be a longer walk however it would be easier on the legs.

Mt. Murray VK3/VE-025

The drive to Mt. Murray takes about 40 minutes  from the saddle of The Twins, or an hour from the Great Alpine road. Since there are steep inclines and declines to negotiate, a 4WD vehicle is required in all conditions.  The track is narrow with only a few places to pull over and allow oncoming traffic to pass.

OLYMPUS DIGITAL CAMERA

A small cairn along the track which lines up with the twins


OLYMPUS DIGITAL CAMERA

Sign near the summit parking/camping area.

The track ends at a car park/camping area some 500m from the summit cairn. Vehicle travel is restricted by a gate.

OLYMPUS DIGITAL CAMERA

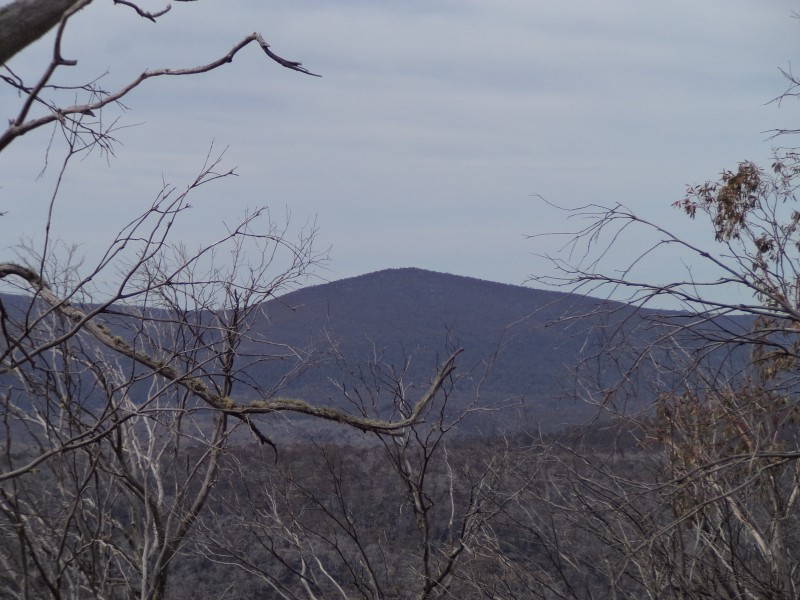
It’s an easy walk to the summit, with great views all around. What a shame the weather was cloudy on the day.

OLYMPUS DIGITAL CAMERA

Looking toward the summit from the road gate.

OLYMPUS DIGITAL CAMERA

I set up the equipment and lashed the squiddy to a very loose pole wedged into the cairn.

OLYMPUS DIGITAL CAMERA OLYMPUS DIGITAL CAMERA

The HF conditions had improved a little but were not great, I managed to contact 10 chasers with average S6 signal reports both ways. Unfortunately this activation had to be the last of the day since I needed to travel home. I enjoyed a great weekend despite the rainy conditions. Achieved successful activation of eight summits and got to see a great part of Australia. I will surely return in 2015 to activate those summits I missed. 🙂

VK3 High Country trek.

November 15, 2014 a mass SOTA activation had been organised for the weekend. What a great idea! It took me  a micro second to decide I needed to participate. Good, but now I needed a plan of attack. My idea was to gain the best value for the weekend and activate as many summits as possible.  I required  summits I had not previously activated, that were close together and relatively easy to access.  A quick check of SOTA mapping  revealed a visit to the Victorian High Country  may be in order. By my estimation, provided everything went to plan, I figured it would be feasible to activate 10 summits during a 3 day long weekend.  I set about looking for a suitable location for camping and a base for the 3 day operation. I decided somewhere near Mt.Hotham would be a good place to base operations.

A work colleague (4WD enthusiast) mentioned a  location where he had camped a few years earlier, it was about 5Km along the Mt.Murray trail and in his words “Its between two hills with a fantastic view” After looking at a map of the area, I found the camp ground and the “two hills” he mentioned, which turned out to be SOTA summits, VK3/VE-017 The Twins and VK3/VE-023. From here there are five nearby summits,  Sometimes you can get lucky! Armed with the directions and maps, I planned to set off for Victoria on the Friday after lunch to arrive in plenty of time to set up camp.

OLYMPUS DIGITAL CAMERA

The camp ground between two summits.

A few days prior to  my departure, the weather forecast predicted a cold front and thunderstorm activity across the state, conditions not  favourable for camping. The high country is one place  you definitely don’t want to be caught camping during bad weather, it can change from fine and sunny to gale force winds and freezing in an instant! Disappointed my luck finding a suitable camp location was short-lived I decided to try for accommodation plan B.

Since Mt Hotham is a winter ski resort, there is an abundance of available accommodation especially during the Spring and Summer months. I managed to find  an excellent well equipped and comfortable two-story apartment in the small hamlet of Dinner Plain.  The price was very acceptable at $83 per night. Actually after being spoilt at this location I decided to stay again next year, “blow the camping!” Since camping was now off the agenda, I left my departure until later in the day. I travelled via Albury and stopped to stock up on food and supplies, as I pulled up in the car park of Wollies a 4WD vehicle identical to mine (Isuzu Dmax) parked next to me.  I asked the driver (Dale) his opinion of the vehicle, this led to a enthusiastic conversation regarding all manner of things Isuzu 4WD related. During our conversation, Dale noticed my radio antennas and said he was  friends with a ham operator  but he could not remember his call.. At that point Dale phonned his friend who turned out to be Chris, VK2XHV and of course Chris and I had a phone contact on the 850Mhz band. Chris mentioned whilst he was not into SOTA his work colleague, Bernard VK2IB was very active. http://vk2ib.wordpress.com/ There you go what a small world!  I did eventually arrive at Dinner Plain later in the evening and managed a good sleep.

Mt. Hotham VK3/VE-006

Saturday morning early, I headed off for Mt.Hotham a 14Km easy drive from Dinner Plain. Arriving at site, I left the vehicle at the carpark directly opposite the summit and proceeded to walk  500m across the road and up to the summit.

20141115_145457

Carpark with Mt Hotham in the background.

I actvated the summit at 22:35Z ,First contact was Paul VK5PAS/p3 in the Lower Glennell National Park, followed by a S2s contact with  Andrew VK1NAM/p2 on VK2/SM-036. Robbie, VK3EK/p called in  later with another S2s contact from VK3/VG133. All chaser calls finished at 23:00, since I had a hour to changeover I decided to pack up and head back to the carpark and on to Mt. Loch.


IMG_0909

View across to Mt.Feathertop.

Mt. Loch VK3/VE-005

Back at the carpark it was time to head away from Mt.Hotham towards Mt.Loch. Upon arrival at the Mt.Loch carpark you are greeted by an  information shelter. There is a day book where you can log the details of your journey. Date of travel, people in party, destination and expected time of return.

20141115_145134

The shelter has information regarding the type of trail, the grade of difficulty and the expected travel time. I had an easy 3.5Km, one hour walk to the summit. It would be great if all summits had such information!

20141115_14541620141115_103853

Information signs at the trail head and a suggestion box with Mt.Loch in the background. I walked around the snow making water storage area and continued along the track toward the summit.

20141115_110845

Along the trail there is a small monument dedicated to Charles Derrick.

20141115_11101520141115_111027

Nearing the summit only 900m to go!

20141115_113117

Looking toward the summit, still a small amount of snow laying around.

20141115_113610

Finally the track to the summit. Or so I thought!

20141115_114330

Actually this track has a small sign laying on the ground requesting people not access the summit via this route. I continued along the trail to another signpost which is closer to the summit cairn. A quick stroll up the rocks to reach the summit.

20141115_115625

My first contact (01:06z) was Andrew VK1NAM/p2 on  summit VK2SM-033.Andrew had just completed his last contact and was moving on to 20metres. So he handed the frequency over to me, or was that threw me to the lions! Hi Hi. By this time of the day the bands were well and truly crawling with summit activations, National Park activations and of course chasers looking for both. I must say everybody was very courteous and patient taking their time to call in and log my activation. Congratulations to all operators. I managed S2S contacts with Robbie VK3EK on VK3/VG133, Phil VK3BHR on VK3/VN016, Peter VK3FALA on VK3/VG114, Ron VK3AFW on VK3VC/031, Ian VK3TCX on VK3/VG114,Bernard VK2IB on VK2/SC025, Peter VK3PF on VK3/VG153 and Tony VK3CAT on VK3/VC005. By the time all chasers and contacts had be exhausted is was 02:33Z. Time to pack up and try for another summit. On the way down I came across a black snake sunning itself on the trail. Once I approached it slithered away into some ground cover.

20141115_135717

After an hour I made it back to the carpark, signed out of the logbook and decided I would have time to access another summit. I loaded the equipment into the vehicle and headed toward The Twins trail.

The Twins VK3/VE-017

The Twins trail is about 10mins drive from the Mt.Loch car park along the Great Alpine road. The track appears to the left next to the Dargo High Plains road.

20141115_185744

There is a sharp switchback near the start of the trail. I followed the trail  until reaching the National Parks gate. A 4WD vehicle is required.

20141115_185134

The trail is subjuct to seasonal road closures. The road is narrow and two vehicles have trouble passing easily. It’s always a good idea to carry UHF CB and call out on CH40 for oncoming vehicles. Since the trail was open I  continued along the ridge until reaching the twins summit in front of me.  I drove past the summit to my left until reaching  a hairpin turn in the road. I parked here.  At this point there is an old 4wd track leading up to the summit. There are many fallen treess across the track and it  is quite a climb. I walked along this track until reaching the summit where the wind was in full force.

20141115_17045520141115_170359

Once on the summit I decided to head back down the activation zone to seek shelter from the wind. I managed to setup the squid pole on a nearby tree and set about activating at 06:22 Z. My first contact in the log was MAtt VK1MA followed by S2S contacts with Robbie VK3Ek on VK3/VG133, John VK2YW on VK2/SW015, Gerard (CW, he forgot his mic) on VK2/IL001, Andrew VK1NAM on VK2/SM053, Tony VK3CAT on VK3/VN030 and Peter VK3PF on VK3/VG041. A rather quick activation finishing at 06:51Z. The weather had started to change with light rain so after a good days activating it was time to head back down the track to the vehicle and home. Made it back to Dinner Plain just as the rain started bucketing down, wind squals were nasty too. It rained all night,  the result, no access to wet trails and no ten summit activation weekend . At least I managed three summits before the rain.

weather

Satellite image for the 15th.


Batteries for portable use.

Batteries for portable radio operation are always an interesting subject for discussion. I have been asked many times which batteries I use. My battery of choice for portable operation is the LiPo (Lithium-ion polymer ) battery.

OLYMPUS DIGITAL CAMERA

I find the 4 cell 5 Amp variety suits my situation very well. The operating voltage can be up to 16.5 volts with no load when fully charged. However the stated nominal operating voltage is 14.8V   Most operators would be concerned  these voltages may cause damage to sensitive 13.8v radio equipment. This is correct in some circumstances.  I operate a Yaesu Ft-857 for  SOTA activations, this is a radio designed for in vehicle operation where voltages may exceed 14.5v. The specifications for the FT-857 state the normal supply voltage is 13.8v +/- 15%. This equates to an operating voltage range of  11.73-15.87V. Even better for the FT-817 being specified at 8-16volts . Ok so I hear you say ” Your  16.5v battery is outside that range!” This is true, however by making use of a full wave bridge rectifier in circuit (I use a MDA3504, 35Amp 400piv variety) the voltage will be lowered by 1.2-1.4v. (remember silicon junction theory 101) There are two advantages, a lower voltage and polarity protection. Ensure you  wire the rectifier correctly in circuit, the Battery  wires are  connected to the “AC” input terminals on the rectifier, Do not be concerned  which battery wire connect to what “AC” terminal it makes no difference. However it is critical  the Radio positive (RED) wire is connected to the + (positive) terminal of the rectifier and the Radio negative (BLACK) wire is connected to the – (negative) terminal of the rectifier. I recommend using an in line fuse between the rectifier and radio for protection.   Once the bridge rectifier is in circuit the no load voltage is  15.1V  from a fully charged LiPo battery.  There are some heat losses via the rectifier however mine is mounted on a small heatsink and becomes luke warm  at 100w output on SSB. I would not recommend a full duty cycle mode such as SSTV or FM for long periods at this output level.

OLYMPUS DIGITAL CAMERA

How long does this battery last on the FT-857?  That depends on what output power is used. For my  SOTA activations I set the output to 30% , (approximately 30w) at this level I have successfully activated 3 summits of about 20 contacts each and still had plenty of power left. There are precautions with LiPo batteries, they can be easily damaged by incorrect charging and balancing. They have also been known to catch fire under certain circumstances. I have not experienced any such issues with the batteries I use, however I follow the documented procedures for this type of battery. It is always a good idea to monitor the individual cell and combined voltage when using the battery. There are many voltage monitoring devices available for purchase, I use a fairly simple unit which emits a loud screech when the cell voltage reaches a pre set level. Mine is set to sound the warning when any cell reaches 3.5Volts.

OLYMPUS DIGITAL CAMERA

 This setting will ensure the alarm sounds when the battery reaches less than 14 volts. The limit can be set lower, however I prefer to err on the side of caution maintaining the battery condition  since replacement cost is not cheap. There are several brands and styles of LiPo battery available, I use the Turnigy  brand,  they have a very good reputation especially with the Radio Control crowd. I prefer to use the hard case variety, they are a little more robust out in the field. There are lower voltage (12.3v) 3 cell LiPo batteries available for those who want to connect directly to the radio equipment. Hobbyking is a good source for these batteries. I tend to avoid ebay as a source of cheap batteries, usually these batteries are cheap because they are  older stock and have not been  regularly charged so have degraded over time. Dealers who have a high turnover of stock do not have this problem.

OLYMPUS DIGITAL CAMERA

 As can be seen here the battery voltage indicated is 16.4v and the display on the radio is 14.9v after the rectifier. Transmitting at full power (100w)  reduces the voltage to 13.2v on peaks. The LiPo battery is able to provide bursts of high current when required, in some cases up to 30 times the charge current to 150A. Charging can be easily managed with the many charges available on line. The charger I use allows an input voltage of 13.8volt perfectly suited to charging batteries whilst driving between SOTA summits.

$_57

OLYMPUS DIGITAL CAMERA

Radio operating at full power with 13.2volts indicated. The battery recovers quickly after transmitting making it ideal for portable operation. In comparison to Sealed lead Acid batteries the LiPo battery is about quarter the weight for the same current, perfect for lugging to the top of summits! As always ensure you read the instructions and follow the precautions for using LiPo batteries with your equipment.

Enjoy!

MX-P50M HF AMPLIFIER REVIEW.

There comes a time after climbing some tough summits when you decide to look at the weight of your backpack. I had  recently walked 20Km to activate a summit in the Snowy Mountains, towards the end of the walk my backpack just felt too heavy. I had stopped on several occasions to rest and I remember thinking “I have to lighten this pack!” The radio I use for SOTA activations is a Yaesu FT-857, it weighs in at 2.5Kg. A great radio which covers all bands and produces 100w output. I also have a Yaesu FT-817, by comparison it weighs only 900 grams without battery pack. I hardly ever take this radio on SOTA activations since I prefer to run about 30watts output and the 817 is lucky to produce 5 watts! I had thought about building a lightweight amplifier to boost the output of the 817 to around 30watts. I looked for suitable components on ebay and this is where I discovered the MX-P50M amplifier. It was advertised specifically to suit the FT 817  and produce an output of 50 watts at a mere 500grams.  My first thoughts were, “this might be one of those dodgy cheap amps, best to be avoided !” With that I decided to move on and continue looking for parts to build my own amp. I found many parts and kits available to build a small amplifier however I was curious about the little amp I had seen. I decided to do a Google search on the amplifier, I found only one positive report on eham and no other information, no circuits nor operation manual. For the asking price ($226 delivered) I decided to purchase a unit, thinking if it did turn out to be dodgy, I would simply use the components to construct a better amp. It took only a week for the amp to arrive from China. The amp ships with a DC cable, an FT-817 control cable and nothing else. No instructions, specifications or circuit!

OLYMPUS DIGITAL CAMERA

Setting up the amp is relative easy, simply connect the supplied control cable to the FT-817 accessory connector and the DC cable to a 13.8v supply. Then connect the coax output from the radio to the input of the amp. The output of the amp connects to your antenna.  The amp has a manual band change switch, so check the band switch is set to the correct position before transmitting.  Not having any specifications, I had no idea what power level could be expected. I connected a power meter and dummy load in line and decided to test initially on 40M.

OLYMPUS DIGITAL CAMERA

Applying 3 watts AM carrier from the FT-817 produced 30Watts indicated on the meter.

  ???????????????????????????????

On SSB a whistle into the mic produced 50watts indicated. So far so good, I proceeded to try the other bands and was delighted to find I could produce 45watts PEP at 28.5 Mhz and 50 Watts PEP on 3.585Mhz, Note the voltage reading of 13.3v.

 OLYMPUS DIGITAL CAMERA

Here you can see the full output from the FT-817 producing a healthy 50watts PEP on the 30M band. I conducted tests at a higher input voltage (14.5v) and found the amp can produce more power output if required. I did find some specifications for the encapsulated  RF device inside the amplifier stating it can accept input voltages up to 24v to produce 100w output. I am not going to try it, the results could be catastrophic!

???????????????????????????????

The MRF 186 encapsulated RF device as used it the amplifier. Also an internal view of the amp, showing the filter layout and circuit arrangement.

OLYMPUS DIGITAL CAMERA

Having tested the amplifier into a dummy load it was time to put the amp “on the air” I started with 40Metres and called CQ with 5 watts only. Vin, VK3FMOL replied and reported a 5×4 signal received at his location. I asked Vin to check my signal strength again this time with the amp on line. My signal report was now 5×8, but more importantly Vin said my audio level had increased quite a lot to the point where I was readable above the noise.  At that point Scott VK7NWT broke in to provide his report. He had been listening and was happy to report the same, an increase from S4 to S9 with a large increase in received audio level. Scott also reported he had tuned across my signal whilst I had been talking with Vin and could find no evidence of splatter or bleed over, thanks Scott. Seems like this test had a few people interested because Ray VK3NBL was next to call in and report he had no particular signal increase but a noticeable audio level increase. Ray had also been looking at one of these amps, but like me was dubious about the quality. As it turns out I had contacts with four or five others whilst using the amp and all the reports were similar, a noticeable increase in audio level and no change in quality with some reporting a signal strength increase also. During the tests I noted the amplifier remained cool to the touch and the current drain was around 6.5 amps on voice peaks.  I have been asked several times if this amplifier can be used with radios other than the FT-817. The answer is yes provided you can supply the correct RX/TX control lines into the amplifier. The amplifier is supplied with a connecting lead and attached plug suited for direct connection to the FT-817 Accessory socket. I have taken the time to check which connections are made to the FT-817 and they are as follows. The Black or in some cases Blue control wire from the amplifier is connected to ground or GND (-VE)  on the radio and the Red control wire from the amplifier is connected to TX GND from the radio. So to operate the amplifier in transmit mode it is a simple matter of shorting the two control wires from the amplifier together when transmitting and open circuit them when receiving.

Some people have asked if there is a way to use the FT-817 CAT control and the connection for the linear amplifier simultaneously. Well in fact one of those people was John Schultz who not only asked the question but provided the answer via a file he found on the net from a SK Charles Socci K1DNR. I have provided that file for download here:simultaneous-use-of-cat-control-and-linear-amplifier-on-yaesu-ft-857d Thanks John for sending me the file and thanks to Charley K1DNR.

Recently my amplifier destroyed the in line fuse every time it was connected to the DC supply. A quick investigation revealed there is an 18v Zener diode used as a form of protection circuit. This diode had gone short circuit causing the fuse to blow. I replaced the Zener with a suitable type and have not had any problems since. There was no apparent reason the the diode to become faulty, unless I inadvertently reversed the DC connection polarity. Maybe I had a seniors moment hi hi!

 In conclusion I can recommend this amplifier to anyone looking to boost their FT-817  output to around 40 watts. I will continue to run  30 watts as usual. For me this amplifier will now accompany the FT-817 on my future SOTA activations. My FT-857 will be installed in the vehicle which will lighten the backpack by 1.1Kg. A good saving!


MT.TUMANANG VK2SM/-049

Mt. Tumanang VK2SM/-049.

One evening whilst looking for summits in my local region (Snowy Mountains) to activate, I noticed Mt. Tumanang appeared under the VK2/SM group on SOTA mapping. Although Mt. Tumanang is on the outskirts of the Snowy Mountains region and a long way from Tumut, I decided to attempt an activation. Not being familiar with the roads around that area, I decided to call Rod VK2TWR to ask if he knew which roads would allow access to the summit. Rod was very interested, he suggested a co-activation and access would be easy from the Anembo Rd. A few days later Rod and I met in Cooma where we left his vehicle parked safely at McDonalds, with local knowledge and an eager passenger on board we set off for the hills! From Cooma we drove along the Monaro Hwy for 62km to Michelago. At Michelago we took Burra Road over the railway crossing until turning right into Tinderry Road. After following Tinderry Road 26km, we met the intersection with Jerangle Road at Jingera. From Jingera we travelled the Jerangle Road for 5km until reaching Anembo, then turned right off Jerangle Road into Anembo road. Following Anembo road for 6km we met the junction of Bald Peak Road.

OLYMPUS DIGITAL CAMERA

The junction of Bald Peak Road and Anembo road.

OLYMPUS DIGITAL CAMERA

We stopped at the junction for smoko prior to turning left into Bald Peak road and entering the Tallagandra National Park. Once on Bald peak road we drove for about 700m before reaching another Tallagandra National Park sign and the Tumanang trail on the left. Note: Logging trucks use Bald peak road regularly, caution is required!

OLYMPUS DIGITAL CAMERA OLYMPUS DIGITAL CAMERA

The Tumanang track appears to be little travelled, we encountered trees blocking the track in a few locations, fortunately I had the  chainsaw on board! Rod decided to take video whilst I cut the trees saving his energy for the climb 🙂

OLYMPUS DIGITAL CAMERA OLYMPUS DIGITAL CAMERA

The track requires 4wd in places along the way, there are two creek crossings, the first  requires a bit of negotiation since there is a steep departure angle. At 9km in we met the Crowbilly Creek.

OLYMPUS DIGITAL CAMERA

Crowbilly Creek crossing, a steady flow about 400mm deep on the day.

After crossing Crobilly creek the track started to climb for 4km to the summit. The track winds around the edge of the summit as it climbs passing the summit on the right. We drove past the summit to  a point where the track turns toward the right. There is enough room to park at this point. Across the road is the start of a saddle up to the summit about 300m. An easy 20 minute walk.

OLYMPUS DIGITAL CAMERA

I placed a few rocks on a tree stump to mark the trail to the summit.

OLYMPUS DIGITAL CAMERA

The trig marker at the summit. Both Rod and I had enough chasers calling to allow the minimum 4 contacts each to claim the activation. A good day was had by all and we both agreed to return next year to re-activate the summit.

View looking from the access track

View looking from the access track

Approaching Mt.Tumanang

Approaching Mt.Tumanang


Snowy Mountains 30 points in one day

I have been travelling the Snowy Mountains Highway and the Tantangara road for many years. Having no previous involvement in SOTA I had not really paid any attention to the summits in the area apart from noticing they were there.  Things are certainly a lot different now days. I seem to find myself looking at every ridge and summit trying to work out if they could be SOTA summits. SOTA is very addictive!  Referring to the VK2/SM  SOTA mapping page there are three summits which can be accessed from the Tantangara Road.  VK2/SM- 027 Mt Nungar, VK2/ SM-033 Blackfellows Hill and VK2/SM-036

I set myself a challenge to try and activate all three in one day. Starting with the hardest first and finishing on the easiest.

VK2/SM-027 Mt.Nungar.

The Tantangara road starts from the Snowy Mountains Highway 71Km from Cooma and 111KM from Tumut.

OLYMPUS DIGITAL CAMERA

OLYMPUS DIGITAL CAMERA

The road is unsealed and can be quite potholed, however it has recently been graded.

OLYMPUS DIGITAL CAMERA

Starting out early I arrived at the Tantangara Road around 7:00Am on a cool but clear day. I drove along the road passing SM-036 and Blackfellows Hill, under the power lines several times until reaching the Tantangara Trail at 13Km from the Snowy Mountains Highway. I decided to leave the vehicle here since there is enough space to safely park off the road.

OLYMPUS DIGITAL CAMERA

From here I walked along the Tantangara road for a further 200m where I discovered a walking trail to the right heading towards the summit. My GPS indicated this location as: 35Deg 49.504S and 148Deg 38.820E. This location is 1353 MASL which leaves only 357 vertical metres to the summit! Hi Hi

OLYMPUS DIGITAL CAMERA

The track winds up and across the ridge through a mix of wooded area and ground cover, there is a large cleared area on the way up which is a good place to rest. Nearing the summit a small amount of easy rock climbing/ negotiating was required. I managed to arrive at the summit after a leisurely 1 hour 40 min. stroll!

OLYMPUS DIGITAL CAMERAOLYMPUS DIGITAL CAMERA

There are two trig markers at the summit, the original laying on the ground and the replacement made of pipe.  View towards Mt. Jagungal in the distance.

OLYMPUS DIGITAL CAMERA

A green canister at the summit, it contains visitors log entries. I was happy to make an addition to log right under VK2TWR and VK3PF.


OLYMPUS DIGITAL CAMERA


VK2/SM-033 Black Fellows Hill

After descending from Mt. Nungar, I walked back to my vehicle and drove along the Tantangara Road back towards the Snowy Mountains Highway. At 6.3Km on the trip meter (6.7Km in from the Snowy Mountains Highway) I met the trail to “Wares Yard Camp Ground” on my right. Following this trail for 500m I arrived at the camp ground and car park.

OLYMPUS DIGITAL CAMERA

OLYMPUS DIGITAL CAMERA

Wares Yard Camp Ground. I parked near the gate at the start of the trail.

OLYMPUS DIGITAL CAMERA

The start of the trail heading up to Black fellows Hill.

I followed the bridle/MTB trail from the gate in a southerly direction towards a saddle after crossing a small creek. At the saddle the trail turns towards the northwest and climbs towards the summit to the north. As I approached the top of the ridge before turning toward the summit I discovered an old wooden trig, it is about 1KM from the summit. I continued towards the summit and set up near the highest point. I looked for a trig but could not find one.

IMG_0402IMG_0399

The shack setup at the summit. Tree stumps make very useful squid pole supports. After activating I descended back down the trail to the car park. Even though this summit is a fairly easy walk about an hour, My legs were starting to let me know I had done enough for the day, so now it was time to head for Tantangara Road and SM-036.

IMG_0404

A view of Mt.Nungar from near the summit.

VK2/SM-036

Travelling along the Tantangara Road for 1.6Km from the Wares Yard Camp Ground (5.1Km in from the Snowy Mountains Highway) I saw a track to my left at the top of the ridge heading toward SM-036. There is a yellow road safety sign at the track indicating “S” bends approaching.

OLYMPUS DIGITAL CAMERA

OLYMPUS DIGITAL CAMERA

This track heads toward the North following the power lines after crossing under the power lines there is a 4wd track heading toward the ridge. I drove to a spot near the summit and walked the rest of the way. There are no trig points here and the summit is about 150m from the top of the track. I operated from the top of the track near some rocks and a fallen tree which is inside the activation zone.

IMG_0374

View from the summit and the fallen tree.

IMG_0394

After activation I headed back down to the vehicle and drove back to Tantangara Road and home to Tumut. The day was great and 30 points certainly made it all worth while. My legs were tired and I was please I had tackled the hardest summit first up especially when I was rewarded with the easy SM-036 at the end of the day.


VK2/SW-024 ,Ginini, Coree, Dingi Dingi, Baldy & Webbs

Having recently activated some tough summits in the Snowy Mountains area, it was time to allow my body to rest and recover. I decided the next summits attempted should be of an easier access variety. Looking into the mapping program it soon became apparent there were quite a few summits in my local region (Tumut) which have vehicle tracks nearby. The Brindabella Mountain area seemed like a good place to start.

To make the most of daylight savings and the good weather I decided to activate 4 summits, any more would be a bonus. I planned to attempt VK2/SW-024, VK2/ST-005 Webb’s ridge, VK2/ST-004 Dingi Dingi Ridge and VK2/ST-003 Devils Peak.

All of these summits appeared to be close to existing fire trails and fairly short walking distance for activation. I contacted Matt VK1MA to ask about access to Webb’s Ridge and that’s when the plans went out the window. Matt informed me the track to Webb’s ridge from the Tumut side; (Gentle Annie Trail) was quite hard going and suggested I try another trail for access. He also told me Devils peak would take quite some time and referred me to VK1NAM’s blog.

Not to be discouraged and aided with some GPS information from Matt, I made a change of plans. A short drive along the Brindabella road from Tumut takes you to the first trail towards VK2/SW024 a summit about to be removed from SOTA since it does not meet the criteria (Advice from Ian VK1DI).

OLYMPUS DIGITAL CAMERA

The Top Flats road heads towards the summit, along the track there is an old fire trail which takes off  left it is very overgrown and leads to the base of the summit. alternately  stay on the Top flats road until you reach a large tree across the road. From either way there is a serious amount of walking and scrub bashing to reach the summit. After activation I returned to the Brindabella road and continued on towards the intersection with Mt. Franklin Road.

VK1/AC-008 Mt.Ginini

From Tumut travelling along the Brindabella Road it takes approximately 1.5 hours to reach the intersection of Mt. Franklin road.

OLYMPUS DIGITAL CAMERA

At this intersection turn right and follow the road for 24Km until reaching the access road to Mt.Ginini. The road has several gates along the way which are usually closed during the winter months.

OLYMPUS DIGITAL CAMERA

There is a 30Km/h speed limit and the road is unsealed, it becomes narrow in places so proceed with caution as vehicles travelling the opposite direction may be encountered. There is parking available near the access road to the summit or if the gate is open there is parking at the summit. From the lower car park you can also access Mt. Gingera VK1/AC-002  it is a further 7Km walk along the road.

OLYMPUS DIGITAL CAMERAOLYMPUS DIGITAL CAMERA

OLYMPUS DIGITAL CAMERA
To activate I walked around the back of the transmitting site and set up on two concrete bricks.

IMG_0892

There is a lower noise level at the rear of the building and a handy tree to attach the squid pole.  I made several contacts just before 00:00 and then activated again after 00:00 UTC for the new day.  After the activations I packed up and headed back towards the Brindabella Range.

VK1/AC-023 Mt. Coree

Back at the Brindabella road intersection I took the Two sticks road towards Mt.Coree.

OLYMPUS DIGITAL CAMERA

Two sticks road starts directly across from the Mt.Franklin road. Two tracks appear at the track head take the road to the right of the sign.

The road is unsealed and has many potholes however the drive is easy and it’s not too long before Mt. Coree looms right in front of you.

OLYMPUS DIGITAL CAMERA

My first thoughts were “How am I going to get up there?” I did not have to wait too long until reaching the access track.  A right turn off the Two Sticks road approximately 8.5 Km in from Brindabella Road.

OLYMPUS DIGITAL CAMERA

OLYMPUS DIGITAL CAMERA

There is a nice picnic ground  at the start of the track, a good place to stop and have smoko prior to heading up to the summit.

The track up to the summit requires a vehicle with good ground clearance and 4WD. There are dangerous cliffs and no safety barriers.

OLYMPUS DIGITAL CAMERA OLYMPUS DIGITAL CAMERA

Along the way up there is a bend in the road where you can park and see a great view into Canberra, unfortunately for me the foggy weather came in and blocked out any photo opportunities. 😦

OLYMPUS DIGITAL CAMERA

At the summit I attached the squid pole to a nearby structure and set up the shack on the rocks overlooking the cliff.

OLYMPUS DIGITAL CAMERA

OLYMPUS DIGITAL CAMERA

This summit is a popular location, there were people visiting the site on a Monday!  A few curious onlookers enquired about my activities.

OLYMPUS DIGITAL CAMERA OLYMPUS DIGITAL CAMERA The Trig and Fire watch tower at the summit.

From this summit I travelled back down the trail until meeting up with Two Sticks road and turned right towards Dingi Dingi Ridge.

VK2/ST-004 Dingi Dingi Ridge

Continuing along the Two Sticks road from Mt.Coree trail for approximately 3KM I saw a track towards Devils Peak on the right and also found the Dingi Dingi fire trail to the left,  following the Dingi Dingi fire trail I arrived at the intersection of  Baldy Range Road.

OLYMPUS DIGITAL CAMERA

OLYMPUS DIGITAL CAMERA OLYMPUS DIGITAL CAMERA

Taking the left hand trail I drove a short distance until finding a suitable location to park and access the summit. Dingi Dingi ridge is only a short walk to the summit however it involves a bit of scrub bashing through some wattle regrowth, towards the summit it thins out a little. I found a suitable clearing in the activation zone and set up the shack.

OLYMPUS DIGITAL CAMERA

OLYMPUS DIGITAL CAMERA

A handy eucalypt tree to support the squid pole

Once the activation was complete I back tracked  to the vehicle, it was at this point I decided to drive back to the nearby Baldy Range trail.

VK2/ST-008 Baldy Range.

From the intersection of Dingi Dingi Ridge trail I drove along the Baldy Range trail for a few kilometres until reaching Baldy Range. There are some spectacular views from this location, a shame it was a foggy day.

OLYMPUS DIGITAL CAMERA

OLYMPUS DIGITAL CAMERA

VK2/ST-005 Webbs Ridge

The trail to Baldy Range is easy going with a few valleys and rocky outcrops along the way. A standard 4wd will make it easily. Having made it to this summit in a short time I decided to have a quick activation with the intent to try for VK2/ST-005 Webbs Ridge. I quickly set up the shack and antenna just inside the activation zone near the highest spot along the trail, after a few contacts I packed up and headed back along the trail to the Dingi Dingi  trail.  The Dingi Dingi trail is very steep and rocky in places and there are some sharp bends. I recommend using a vehicle with good ground clearance and low range 4WD to access Webbs Ridge via this track. I made it to Webbs ridge after what seemed to be a long time, however I managed to set up and activate the summit with just enough time to travel back the way I came. (Sorry no photos battery expired! 😦 ) One big day out with 6 summits activated! I will return next year and do it all over again, but next time I will miss SW024 and head for Devils peak instead. I would recommend activating Dingi Dingi ridge and then travel to Webbs Ridge before activating Baldy RAnge. Thanks to Matt VK1MA and VK1DI Ian for their information on these summits. From the Dingi Dingi fire trail it took me 1 hour 45 minutes to drive back home to Tumut.

Peak Back Ridge VK2/SM-037

I had been looking at this summit for some time and finally managed to organise a day to make the assent. A small amount of planning was required since there are two river crossings involved. Not wanting to get too wet I decided (after a suggestion from Rod VK2TWR) to acquire some waders.

I met Rod at the old Kiandra Court house off the Snowy Mountains Highway 90Km NW of Cooma. After some equipment swapping between vehicles we headed North on the Snowy Mountains Hwy towards Tumut for 11Km where we met the Bullocks Hill Fire Trail to the right.

20141014_131457

Taking the trail we travelled for 1km until reaching the first road gate, which is locked during winter. (May until long weekend in October) We continued on for another 4.7Km to the intersection of the Tantangra Creek and another locked gate. We had to park the vehicle here since this gate is always locked. Ok so now the first challenge, crossing the icy waters of Tantangra Creek.

OLYMPUS DIGITAL CAMERA

Time for the waders, (2nd challenge putting them on!) and making sure our packs are well secured. The creek was knee-deep with a reasonable flow and slippery rocks, even with waders the water was very cold on my legs, lucky  it was only a short crossing. Once across the creek we decided to remove our waders, we were not keen on walking the trail wearing them.

Across Tantangra Creek the track turns uphill towards the right and continues 200m to a Y in the road. At this point we took the trail to the left and walked another 1.6Km down to the Murrumbidgee River. There is a river gauging station and flying fox at this point.

We walked along the river bank for 200m until we came to a bend and some shoals , a perfect spot to cross the river directly in front of the ridge heading up to the summit.

OLYMPUS DIGITAL CAMERA OLYMPUS DIGITAL CAMERA OLYMPUS DIGITAL CAMERA

Now challenge No.3, putting on wet waders and crossing the Murrumbidgee River. Again we were met with a steady flow and slippery rocks whilst crossing.  This time after crossing the river we decided to leave the waders hanging in a small tree since they would not be required until the return trip. I marked the tree as a waypoint on the GPS just to make sure we would find it again.

20141010_125547

Rod could not resist taking this photo of me crossing the Mighty Murrumbidgee!

Once across the Murrumbidgee we followed the ridge up and across to the bottom of the summit about 2Km. This summit is an old volcano and the ridge on the side of the rim is where we were heading for.

20141010_123525

Looking from the start of the ridge toward Mt Yarrangobilly in the distance. Then looking at the summit through the scrub.

20141010_122336

When we arrived at the top of the summit we were disappointed to find there was a further 2Km walk around the rim to make it to the highest point as indicated on the GPS. At the summit we were greeted with a great view of Blackfellows Hill and Mt Nungar .  We setup the SOTA station, Rod kicked off at 23:50 and I followed at the new UTC day  we contacted 15 chasers each,not too bad for a weekday.

OLYMPUS DIGITAL CAMERA20141010_112023 OLYMPUS DIGITAL CAMERA

The antenna setup and operating position with the view across to MT Nungar.


Mt Wee Jasper VK2/ST-017

This description is part 2 of a three summit one day activation from Tumut. To continue from Tumorrama Hill to Wee Jasper, go back on Lee Archers road for 3.5Km until you meet Fairview road.

At Fairview road turn left and head 800m towards Wee Jasper road.

Turn right at Wee Jaspers road and continue for approximately 17Km to McPhersons Swamp Loop (Swamp Road) road on the right.

Turn right into McPhersons Swamp Loop road and continue for 6.5km till reaching the intersection of Wee Jasper road.

Turn right into Wee Jasper road and continue approximately 1.2Km to Pheasant Creek Rd.

Turn right into Pheasant Creek Rd

Drive along Pheasant Creek Road for approximately 2Km here you should see a track on your left. (Actually this will be the fourth track on the left after entering Pheasant Creek Road)

Turn left into this track, follow for approximately 1Km to a T intersection. The track is very muddy in wet weather use of 4wd is required.

Turn right at the T intersection and follow for approximately 1.8Km a track will appear on your left.

Take the track on your left and follow for 600m where there will be a Y junction.

On your right will be a track into a pine Forrest take this track and follow for 1Km.

20140804_123246

There will be a sign in front of you (Hume & Hovell track) the summit  Mt. Wee Jasper VK2/ ST-017 is a short 700m walk from here.  For a more detailed description I suggest reading VK1NAM’s Blog on this summit.


Snow Gum Mountain VK2/SW-28

From Wee Jasper go back approximately 1Km to the intersection, turn left and continue to Pheasant Creek road.

Turn right into Pheasant Creek road and continue approximately 2Km to Wee Jasper road.

Turn right into Wee Jasper road and continue approximately 2.2Km to T intersection.

Turn right and continue approximately 9Km to Nottingham Road.

nottinghamrd

Enter Nottingham road and continue for approximately 18.5Km via the small hamlet Micalong Creek then a few mountain tops (One of them is High Cone VK2/ST-014 not enough time in one day for this one) finally a cattle grid entering the State Forrest and eventually reaching a point under the power lines near the summit.

snowgum

Nottingham road continues off to the right at this intersection. There is a track to the left of this sign which takes you to a CAA VOR Communications Site.

snowgumgate

Walk around the gate and up the ridge for 800m on the sealed road. The no trespassing or (human) interference refers to the site at the summit. It is an Air Services Australia site containing an operational  VHF Omni Directional Radio Range  There are active antennas on site which would be effected by human interference, the site is fully fenced to keep people out for safety.

(VOR). This is a type of short-range radio navigation system for aircraft, enabling aircraft with a receiving unit to determine their position and stay on course by receiving radio signals transmitted by a network of fixed ground radio beacons. It uses frequencies in the very high frequency (VHF) band from 108 to 117.95 MHz.

Reaching the summit you are greeted by more fencing and signs,  I would recommend not transmitting on 6 or 2m from this site. I operated 40M only from the far rear of the site maintaining a suitable RF safe distance. There is a stump near the rear fence to attach the squid pole.

A nice rock operating position is also nearby.

snowgumgate1


Satellite Photo of the site

nottingham

There is also a nearby NDB site on Nottingham road, low frequency low power HF does not effect the VOR.

I hope this information is useful for others.